A Brief z80 Assembly Tutorial
Chapter 11
Next we'll deal with the whole multiple levels thing, including level select screen.
For us to have multiple levels, we'll need to define the level structure. So far we've been using a raw 16*12 byte array, but let's say we want a small description for the level as well as a gem goal to open the doors. We'll round the data of a level to 256 bytes for easy indexing and use a very sjasmplus-specific feature of structures.
Level Structure
        STRUCT LEVEL_DATA
tiles   TEXT 16*12
title   TEXT 32
gemgoal BYTE 1
gemgoaltext TEXT 16
reserved BLOCK 16-1
        ENDS
Our level structure has the 16*12 bytes for the tiles, maximum 32 bytes for a title we can print in the level select, one byte that says how many gems needs to be collected and the same in text form so we don't need to deal with integer to string conversion. The rest is marked as reserved to round it up to 256 bytes.
I mean, we could do integer to text conversion, but since the hardware has no DIV, it's pretty tedious. I've done it in several ways in the past, including implementing DIV as loops, or by using binary coded decimal (BCD) which the z80 has hardware support for. Fun fact! So did x86 until x64 came along.
Using the structure our level definition changes into something like this:
levels: LEVEL_DATA {
{
0,0,0,0,0,0,0,0,0,0,0,0,0,0,0,0,
0,0,0,0,0,0,0,0,0,0,0,0,0,0,0,0,
0,0,0,0,3,3,3,3,3,3,3,3,0,0,0,0,
0,0,0,0,3,6,2,2,2,2,5,3,0,0,0,0,
0,0,0,0,3,5,2,2,6,2,2,3,0,0,0,0,
0,0,0,0,3,2,2,2,2,2,2,3,0,0,0,0,
0,0,0,0,3,2,1,2,2,2,7,3,0,0,0,0,
0,0,0,0,3,2,2,2,5,2,2,3,0,0,0,0,
0,0,0,0,3,6,2,2,2,2,2,3,0,0,0,0,
0,0,0,0,3,3,3,3,3,3,3,3,0,0,0,0,
0,0,0,0,0,0,0,0,0,0,0,0,0,0,0,0,
0,0,0,0,0,0,0,0,0,0,0,0,0,0,0,0,
},
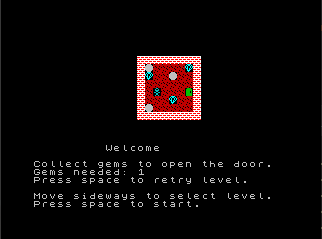
{"Welcome"},
1
{"1"}
}
LEVEL_DATA {
{
2,2,6,3,5,2,2,2,2,2,2,2,16,2,0,0,
2,5,6,3,2,2,6,2,2,2,2,2,15,2,0,0,
2,2,2,3,2,6,2,2,2,2,2,2,0,2,2,0,
3,2,3,3,2,2,2,6,2,2,0,0,0,0,2,4,
2,2,2,6,2,2,2,2,2,2,0,2,0,0,2,0,
2,2,0,2,2,2,6,2,2,2,2,2,2,2,0,0,
0,1,0,2,6,2,2,7,2,6,0,2,2,2,0,0,
2,2,2,2,2,2,2,2,2,2,12,0,0,0,2,2,
2,2,2,2,2,2,2,2,2,2,0,2,2,0,2,2,
2,2,2,2,2,2,2,2,2,2,0,2,2,0,2,2,
2,2,2,2,2,2,2,2,2,2,0,0,0,0,2,2,
2,2,2,2,2,2,2,2,2,2,2,2,2,2,2,2 },
{"Testlevel"},
132,
{"132"}
}
And so on. We can hop to the desired level by pointing at levels and adding 256 until we're at the level we want.
Our map definition changes to use this too:
map: LEVEL_DATA {}
Spoiler: this will cause problems later on.
We'll need just a couple more bytes of data before we can dive into the level select itself.
level:
        db 0,0

maxlevel:
        db 1,0
The current and maximum level. Both of these could be just single bytes, but let's assume we have the time and space to make more than 256 levels..
Level Loading
levelselect:
        ld a, 0
        ld (playerdone), a

        ld a, 0
        out (0xfe), a

loadlevel:
        ; clear screen
        ld hl, SCREEN
        ld (hl), 0
        ld de, SCREEN + 1
        ld bc, (256/8)*192+32*12 - 1
        ldir

        ; set bottom attributes to grey text
        ld hl, COLOR+32*12
        ld (hl), 7
        ld de, COLOR+32*12+1
        ld bc, 32*12-1
        ldir

        ld de, map
        ld hl, levels
        ld bc, (level)
        ld a, h
        add a, c
        ld h, a
        ld bc, 16*16
        ldir

        call drawminimap
The level select changes a bit. There's a label for loadlevel which we'll be hopping back to whenever the user moves sideways; we clear the screen, set the bottom part to grey for the text to appear (if it's black on black, the contents of the bitmap don't matter, you won't see anything).
Then we point at the levels, hop forward as many levels as we need - adding to H moves forward in 256 byte steps - and LDIR the whole 256 bytes into our map.
If you compile and run at this point, you'll find that something went wrong.
If you recall, our map shared the same 256 block with the interrupt trampoline. Now that we grew it, we'll overwrite the trampoline, and our interrupt along with the data we write over it eventually leads the CPU to execute code at the start of the ROM, which is basically the same as power-cycling the machine.
We'll fix this by just moving the map data 256 bytes downwards, to 0xfc00:
        ORG $fc00
map:    LEVEL_DATA {}
What we really should do is move where the interrupt points at, but this is a single character fix so we'll live with it.
Next up, after drawing the minimap, we can print the level title.
        call drawminimap

        ld bc, 0x090f
        ld hl, map.title
        call printtext
Note that we can conveniently point at the structure members now, so map.title gives the position of the title in the level data structure which we can print out.
Which means we need to deal with the printing of text.
The Printing of Text
; printtext: draw asciiz string.
; bc x/y coordinates, hl text string
printtext:
        ex de, hl
        ld ix, 0
        add ix, de
We want IX to point at our text string. Since there's no way to just LD IX, HL we'll do some trickery - set IX to zero and add HL to it. Except there's no ADD IX, HL either, so we need the value in DE or BC. There's a cheap EX DE, HL instruction which swaps the contents of DE and HL, so that fits the bill. This trickery takes 1+4+1=6 bytes and 4+14+11=29 clocks. The alternative, PUSH HL + POP IX would have taken 1+2=3 bytes and 11+14=25 clocks, proving once again that doing things the straightforward way often makes more sense than trickery.
        ;           H          |            L
        ; 0 1 0 Y7 Y6 Y2 Y1 Y0 | Y5 Y4 Y3 X4 X3 X2 X1 X0
        ld a, c
        rrca
        rrca
        rrca
        ; AND any additional bits off
        and 0xe0
        ; Add x
        add a, b
        ld l, a  ; coordinate bottom byte done
        ; next we do the same for Y6 and Y7; no need to shift because we're in the
        ; right place.
        ld a, c
        and 0x18 ; AND extra bits off, and h is done.
        ld h, a
        ld bc, SCREEN
        add hl, bc  ; now hl points at the screen offset we want
        ld bc, de
        ld de, hl
We start off exactly the same as with our 8x8 minitiles, because, well, 8x8 characters are exactly the same as the bitmap part of our minitiles.
printtextloop:
        ld a, (ix)
        cp 0
        ret z
        ld l, a
        ld h, 0
        add hl, hl ; *2
        add hl, hl ; *4
        add hl, hl ; *8
        ld bc, 0x3D00 - 32*8 ; font offset in ROM, which starts from space
        add hl, bc
We'll use the ROM font. We can swap this out to custom 8x8 pixel font simply by changing the pointer to the font data if we want. We fetch the next character in the string, check if it's zero and return if it is. Then we multiply the character by 8, add that to our font data offset, and we're ready to draw. Since the ROM font starts from a space glyph, we need to decrement the pointer by 32 characters, as space is the 32nd ASCII character.
        DUP 7
            ld a,(hl)
        	ld (de),a
        	inc hl
        	inc d
        EDUP
            ld a,(hl)
        	ld (de),a
        inc ix
        ex de,hl
        ld bc, -256*7+1
        add hl, bc
        ex de,hl

        jp printtextloop
Drawing itself goes like with the tiles. After drawing, we move to the next character offset on screen, and increment our string index. We use EX DE,HL here again, but this time it makes more sense.
Rest of Level Select We still need to add the actual action of selecting a level. With all the other pieces in place, this is rather straightforward.
levelselectloop:
        ld a, 0
        ld (movekey), a

        call scaninputs

        ld a, (movekey)
        bit 2, a
        jr nz, level_prev
        bit 3, a
        jr nz, level_next
        bit 4, a
        jr nz, startgame
        jr levelselectloop
The level selection loop changes to check for sideways movement as well as the space to start the game. The handlers for the sideways do what one might expect:
level_prev:
        ld a, (level)
        cp 0
        jr z, levelselectloop
        dec a
        ld (level),a
        jp loadlevel

level_next:
        ld a, (level)
        ld hl, (maxlevel)
        cp l
        jr z, levelselectloop
        inc a
        ld (level),a
        jp loadlevel
When decrementing we check if we're already at the first level and don't do anything if we are; otherwise decrement and hop back up to the loadlevel. Incrementing works the same way, except checking against the maximum level value. Since the number of levels is not going to change at runtime, this could be a comparison against a constant.
That's that, and after adding a few lines of help text to the level selection we're done with it.
This chapter's version of the source is available here.
Size is up to 5734 bytes, up 722 bytes. That includes the fact that level data grew from 192 to 256 bytes and there's two levels, and there's a bunch of text strings too which take surprising amount of space. The text print routine takes mere 84 bytes.
Unless I've forgotten something. we have two things left: finishing gameplay things (gems and doors), and audio.
Any comments etc. can be emailed to me.