Teensy LC Midi Pot Box
Okay, I have to admit this is less of a tutorial and more of "what I did", but since it's a step by step thing, you might as well follow along. I do not claim to be an expert in anything mentioned here, however what I did seems to work, so hey, it might work for you too.
After seeing some YouTube videos on people making custom MIDI controllers using Teensy boards, I figured I'd build one as a fun little project.
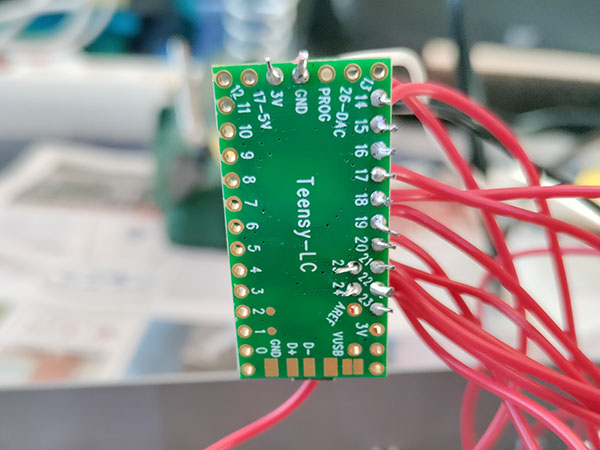
The Teensy LC (low cost) seems to be the teensy that is most readily available at the moment without an insane mark-up.
DEV-13305
1568-1233-ND
TEENSY-LC KL2X EVAL BRD
I wanted to make a box with as many pots as possible; LC has 13 analog inputs, so 12 sounds like a sensible value. Then I started looking for circuit diagrams, finding none (probably because it's so simple), but I did find useful discussions on pot values, and from 50kOhm and 10kOhm ones, the smaller ones are the recommended. I would have expected higher values to be more stable, but apparently it's the other way around.
Anyway, here's the circuit: 12 pots wired to Vcc/Aref on one side, ground on the other, and the middle / signal pins wired to Teensy's analog inputs.
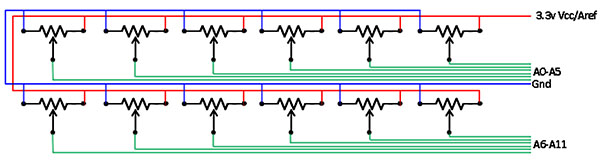
As far as I know, ARef on the teensy-lc is same as the 3.3v Vcc. As a warning, there's 5v pins too, using those will fry the teensy, so don't use those. Based on some discussion, if the pots are noisy, adding 470pF-0.1uF ceramic capacitor between signal and ground may help. I'm really happy I didn't need to do this, as doing everything 12x is painful as is..
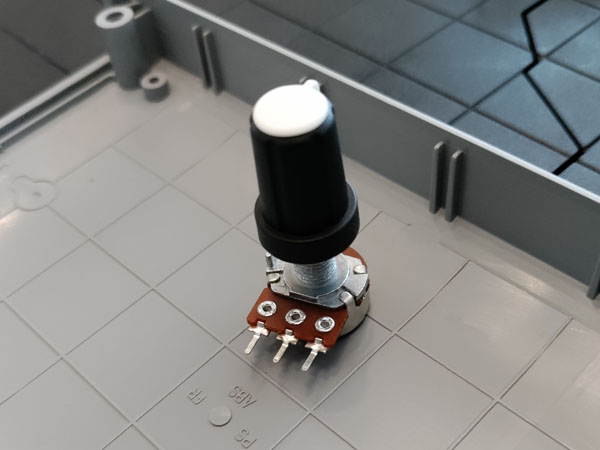
Then I spent some hours browsing Digi-key to find the parts I need; I wanted pots that are mountable, cheap, available, linear and 5kOhm. I didn't care about power ratings because... just how much power the teensy can pump out?
PDB181-K420K-502B
PDB181-K420K-502B-ND
POT 5K OHM 1/5W CARBON LINEAR
Finally I spent crazy amount of time finding the knobs for the pots, looking at the various photos of the fittings. Here again I didn't want to spend a lot of money, and it's surprising how much a knob can cost.
1227-L
1722-1312-ND
KNOB SERR W/SKIRT 0.236" PLASTIC
In the end I paid about 13 eur for the teensy lc, 12 eur for the pots and 17 eur for the knobs. I was really relieved to find that the knobs fit the pots.

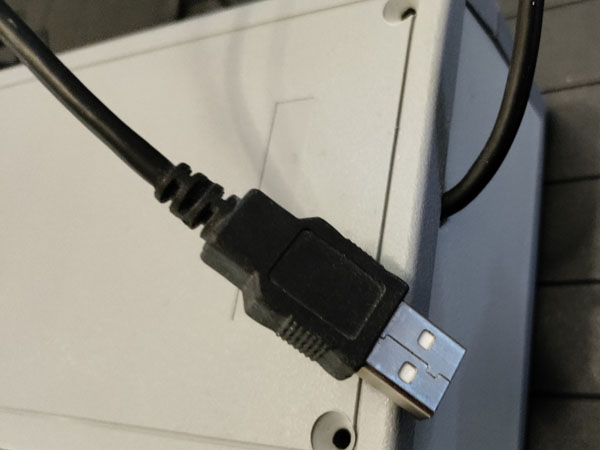
My original plan was to find a child's toy whiteboard and mount the knobs there; that way I could write whatever the knobs do and wipe it out when the use changes. Unfortunately (or fortunately, who knows) I didn't find anything suitable in local stores, so I decided to use a "hobby project box" I had bought ages ago. I also used a micro-usb cable I had laying around.
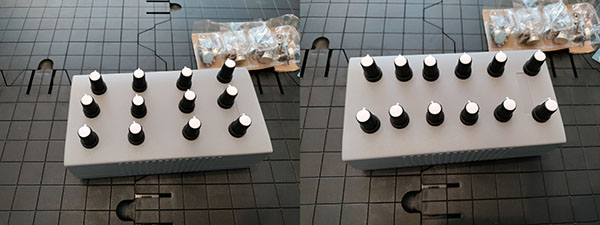
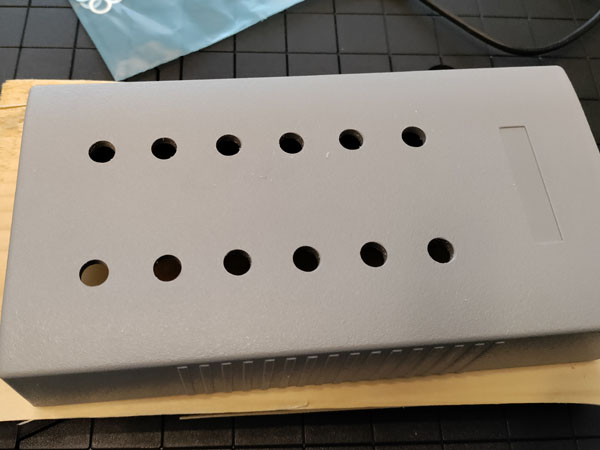
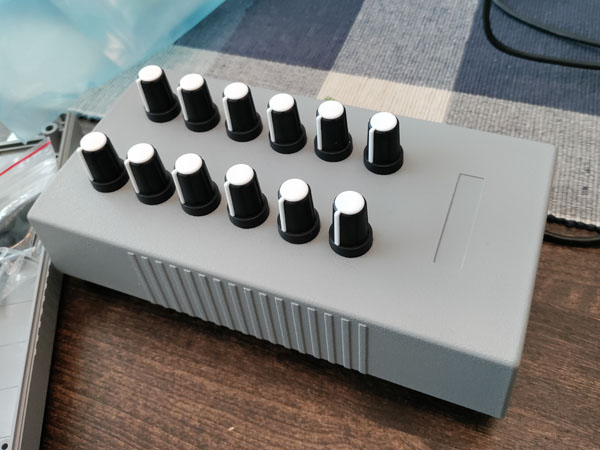
All items collected, I figured I'd start with the layout. 6x2 layout felt better on this box than 3x4.
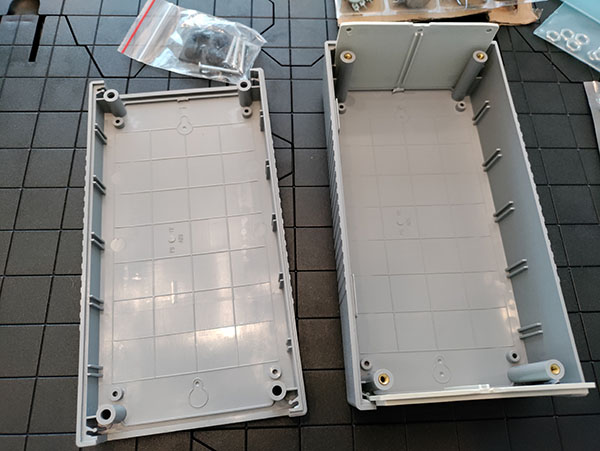
The box had this handy spacing grid in the inside, which made layout measurements easier.
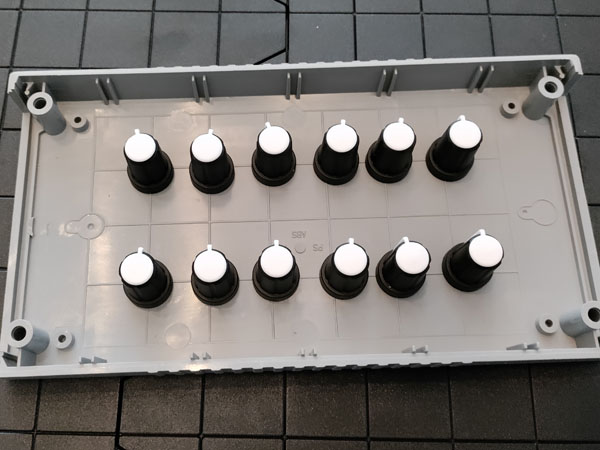
I decided to shift everything a bit to one side, maybe I'll fit something else to the other end eventually. (The teensy has tons of pins, so it's possible I'll find some use for the various digital / touch / audio / whatever pins).
I also checked that the pots themselves will fit in the layout so I don't need to curse a lot later on.
The holes go to the deeper side of the box. Since using christmas tree drill bit from this direction felt awkward, I first marked the points, and then drilled holes with the smallest drill bit I could find. This let me do the rest of the drilling outside in.

Using a block of wood to drill against as not to destroy whatever table I was using.
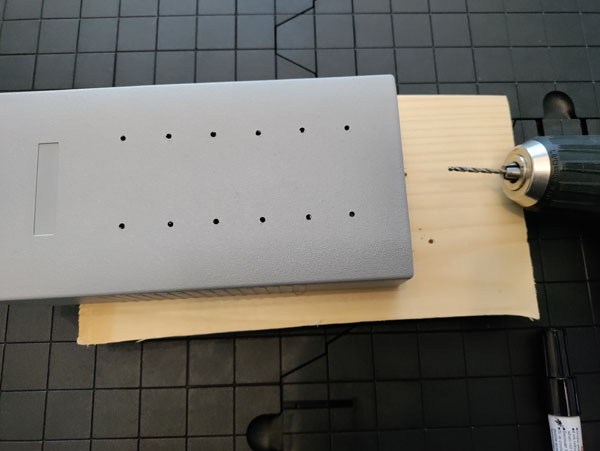
Now I could use the big drill bit easier, by using these marking holes.
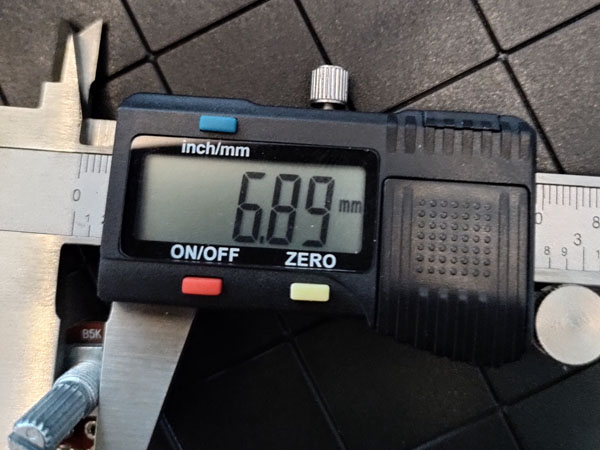
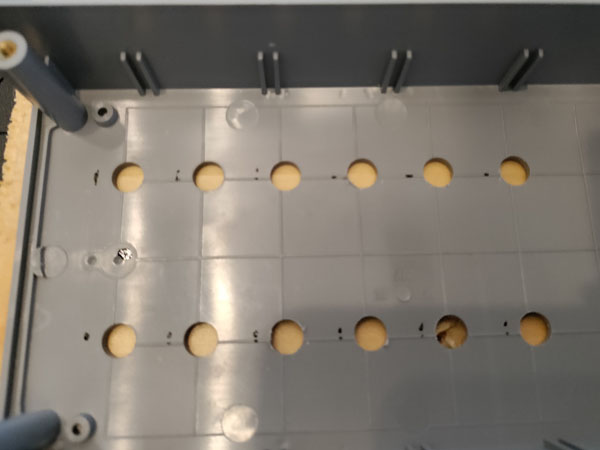
I measured the pots to find what size of a hole I'd need. Unfortunately the size was about 7mm...
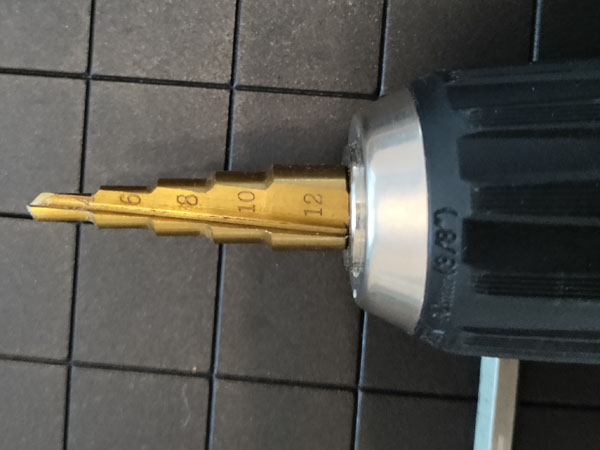
...while the christmas tree drill bit steps are 2mm.. so 8mm holes it is. Fortunately this wasn't a problem.
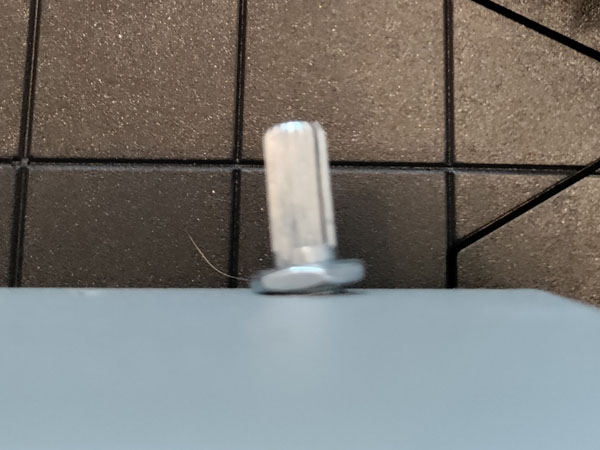
After drilling a hole I tried fitting a pot and it was really tilted.
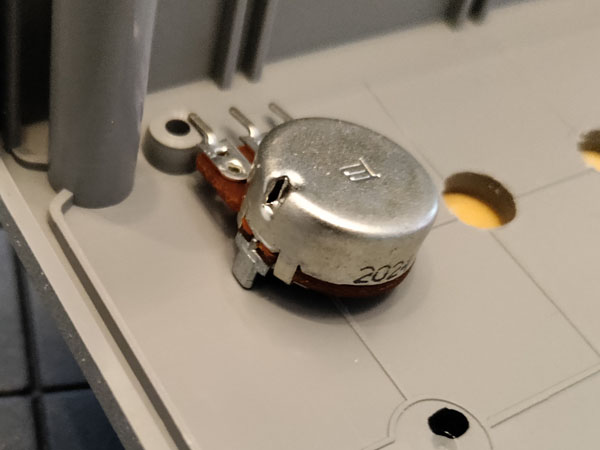
Ah, I think I can see what the problem is.
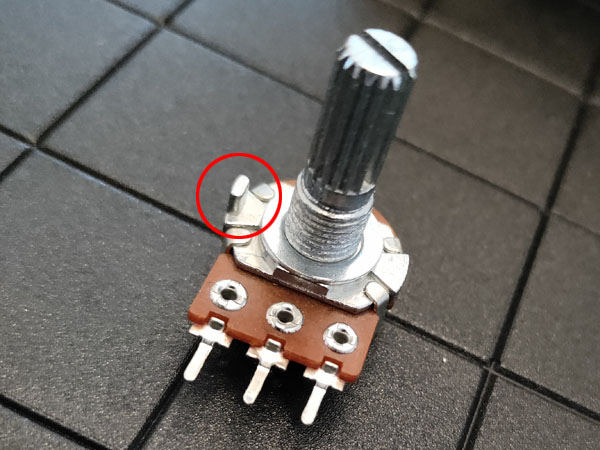
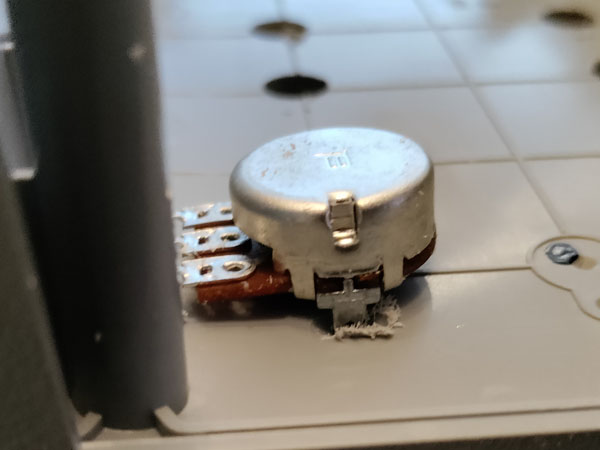
There's a "claw" on one side that is used to stop the pot from rotating from heavy-handed use. I considered clipping these off somehow, but figured I might as well use them and Dremel small indents next to the pot holes.
So, first, I enlarged all the holes. The result isn't perfect, but then again, I'm not a machine. The result would have been way worse without the christmas tree drill bit.
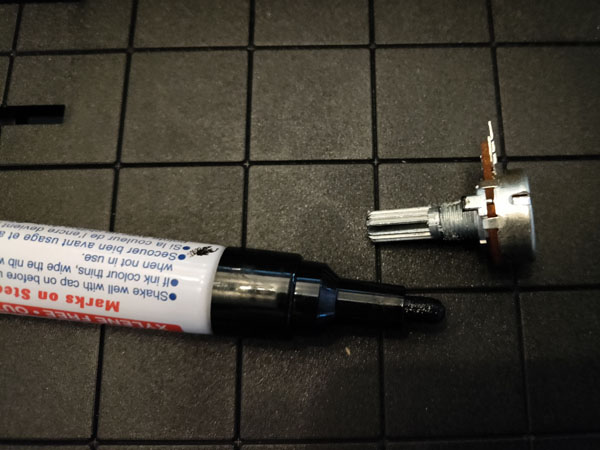
Next, I used a marker on the "claw", and used that to place marks on where I need to Dremel.
..repeating 12 times..

Next, I carefully as not to punch new holes in the box made the first indent. I also removed a round plastic thingy that was slightly in the way.
Seems to work.
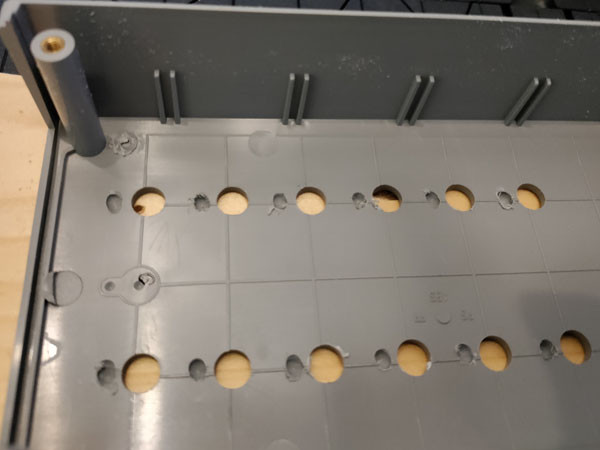
Realizing every step I'm making I'll have to repeat 12 times, I sighed and got to work. After a lot of grinding and vacuuming, I figured it's good enough.
Testing a random hole, the pot looks pretty straight now.
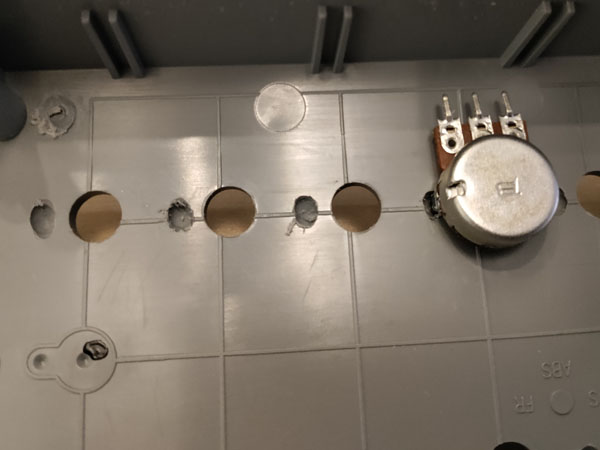
And I guess the dremeled indents do make them a bit more stable.
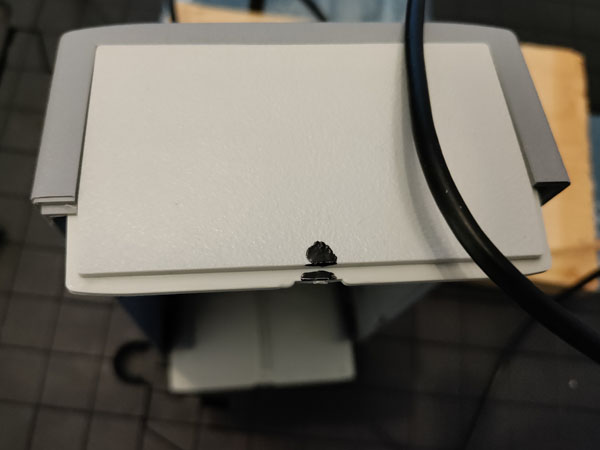
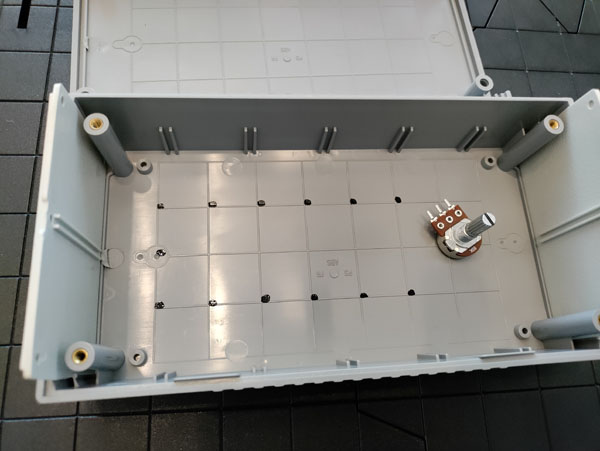
While I had all the tools out I figured I'd make a hole for the USB cable too. I first marked what I need to carve out, and then dremeled the hole.
I think the result is pretty decent. The cable will need some attachment point inside the case so I don't break it by pulling on the cable.
A few days later I did the next step, checking if the connection works. First I checked a pot and the resistance between the middle and edge pins ranges from couple hundred Ohm to 5kOhm, which I guess is to be expected.

Next I followed the instructions on pjrc.com (the makers of teensy), installing Arduino and then teensyduino on top of it. After tweaking the blinky example to make sure the programming works, I changed the program to read from analog port 0 and print it to the serial console.
int led = 13;

// the setup routine runs once when you press reset:
void setup() {
  // initialize the digital pin as an output.
  pinMode(led, OUTPUT);
  Serial.begin(9600); // USB is always 12 or 480 Mbit/sec
}

// the loop routine runs over and over again forever:
void loop() {
  int val = analogRead(0);
  Serial.println(val);
  digitalWrite(led, HIGH);
  delay(100);
  digitalWrite(led, LOW);
  delay(200);
}
The result was random values (as expected).
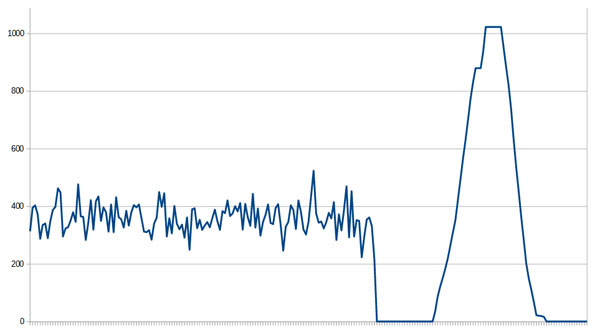
I wired one pot to the teensy, hooking edge pins to 3V and ground, and center pin to A0 (pin 14). The random values changed to really stable, consistent ones, ranging from 1 to 1023.
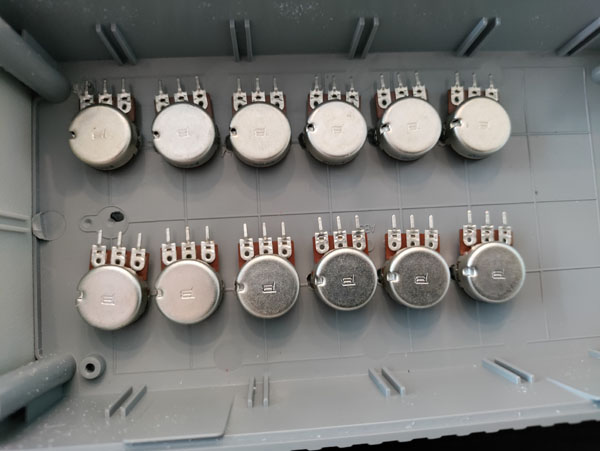
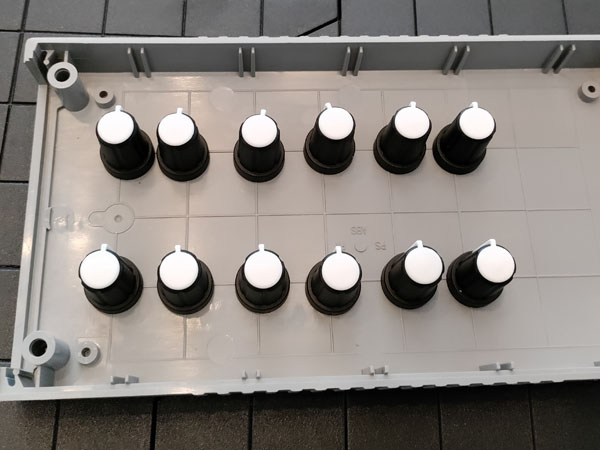
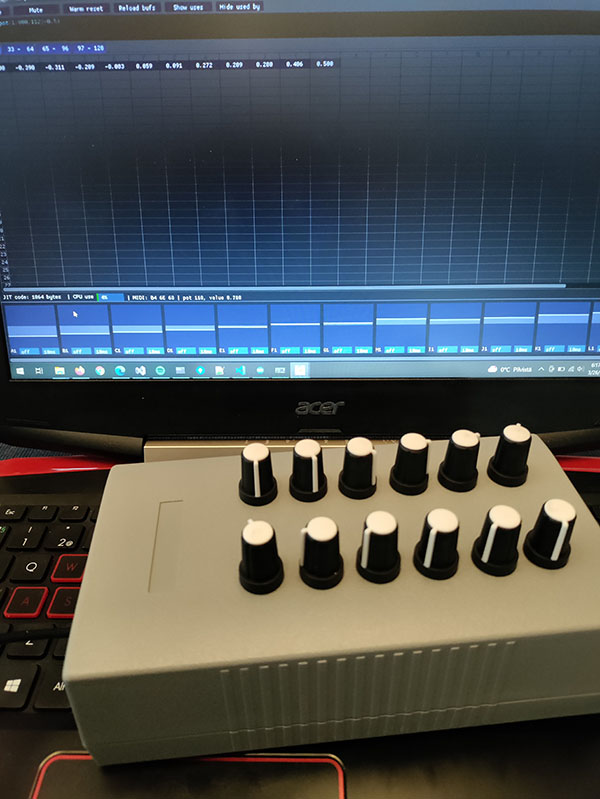
Happy with the progress, I put all the pots in the enclosure.
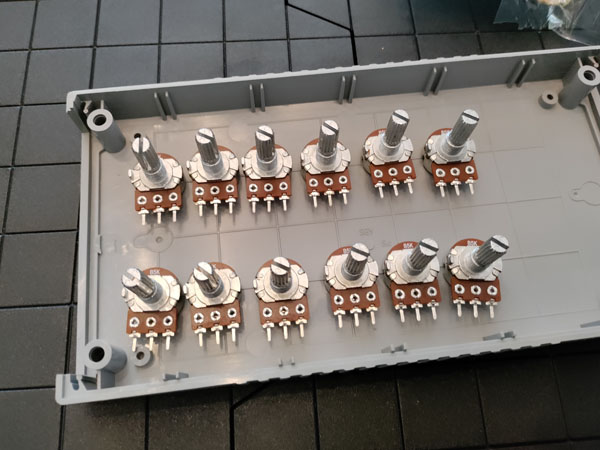
When it comes to wiring, it's possible I would swap ground and Vcc by mistake, but as long as I was consistent, this won't be a problem, as I can just invert the values in code. The teensy's 48MHz ARM core shouldn't have problems with a little bit of math.
I cut wires for the ground and vcc chain as well as wires for the signals. I'm using black, white and red wires here, because that's what I happened to have at hand. Optimally I would have used several colors for the signal wires.
If I had had slightly thinner wire I would have just pulled it through the pots' wire holes without cutting it and then melted the plastic to make connections. Since that wasn't possible, I made a lot of short wires instead.
I kept the wires relatively short but still long enough that if I have to take this thing apart, I should not need to desolder anything.
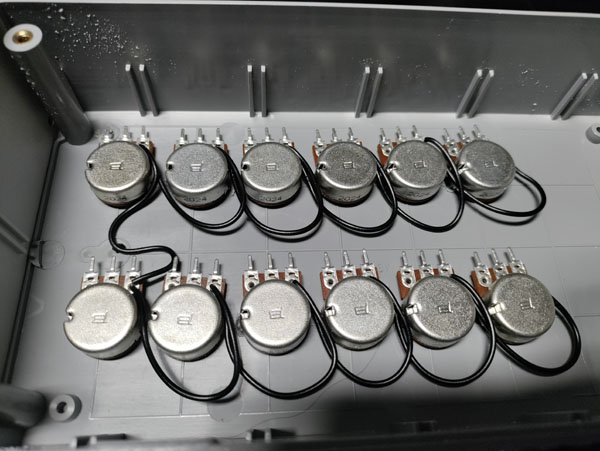
First chain done, cable management is still tolerable.
With the second chain things are getting quite crowded, but still acceptably clean.
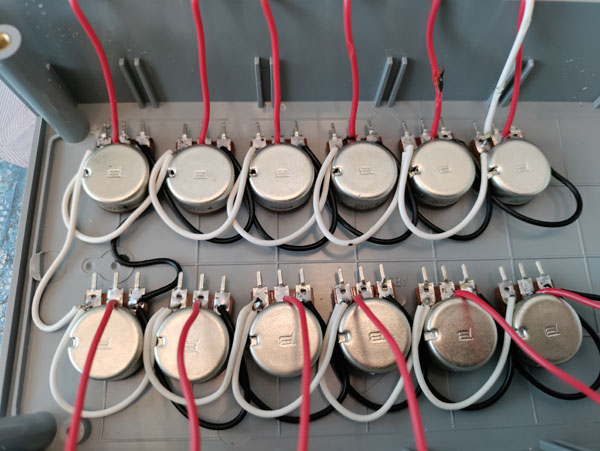
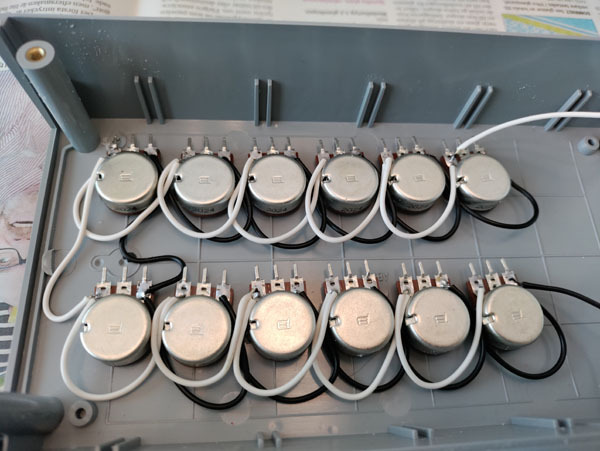
Signal wires connected, things are getting really crowded. I managed to damage one of the wires by touching it with the soldering iron while working on the next wire over, but figured it'd be fine.
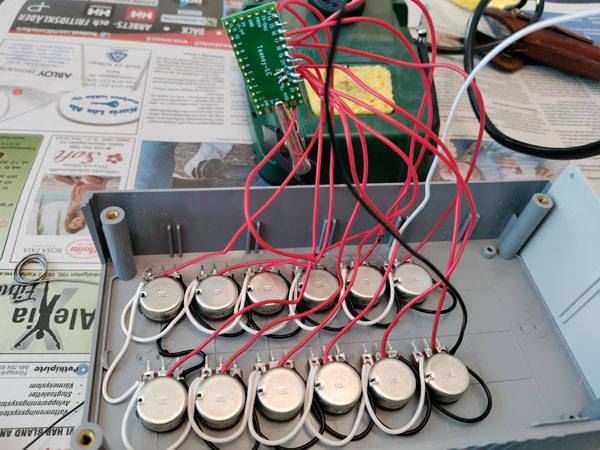
Soldering wires to the teensy was somewhat stressful, because it's... rather tiny. And I have a limited supply of them. I think it's about as small thing as I'd ever want to solder.
Finally done, I clipped some of the excess from the wires in hopes I'd avoid shorts.
Yes, I could have wired the pots to Aref instead of 3V, and the result might have been less noisy (not that it matters in this application).. but on the other hand I had done my testing with the 3V pin and that worked fine, I didn't feel like changing things now. Also, the Aref area is pretty crowded as is.
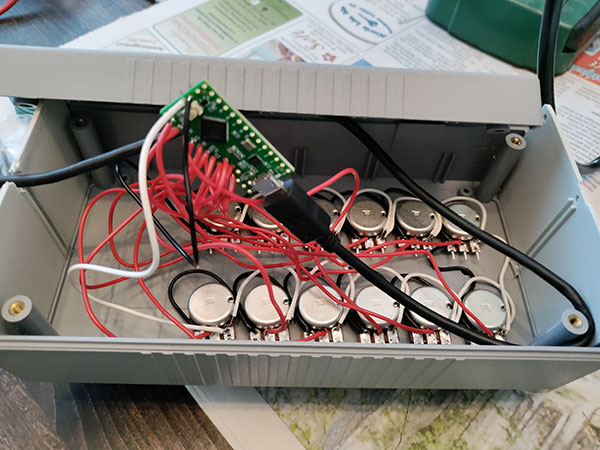
And then it was time to cram everything in the box. I hooked the USB cable around one of the support pillars to avoid it moving around.
Next up, software.
int val[12];
for (int i = 0; i < 12; i++)
  val[i] = analogRead(i);

for (int i = 0; i < 12; i++)
{
  Serial.print(i);
  Serial.print(":");
  Serial.print(val[i]);
  Serial.print(" ");
}
Serial.println();
The test program shows that the pots work, except... one of them gave solid 1023 regardless of the pot position. I opened the box to see if there's something obvious going wrong, and sure enough, it was the pot with the damaged wire.
I clipped the wire and the port started giving out random values, as expected. Before cutting I should have thought a bit - why is it giving the max value? If the wire had been damaged enough to be disconnected, it would have been the same as cutting the cable.
Turns out, both the signal and Vcc wires were connected to the pot chassis, due to too long exposed bits of cable. By bending the wires a bit (after re-connecting the signal cable) things started working. I guess I should have added insulation tape there too, which I'll do if the problem re-appears.
After switching the device USB type to midi and writing this very simple driver, things started to work.
// random channel, chosen by die roll.
int channel = 5;

// the setup routine runs once when you press reset:
void setup() {
}

int prevval[12];

// the loop routine runs over and over again forever:
void loop() {
  int val[12];
  for (int i = 0; i < 12; i++)
    val[i] = analogRead(i);

  for (int i = 0; i < 12; i++)
  {
    if (abs(val[i] - prevval[i]) > 8)
    {
      usbMIDI.sendControlChange(101 + i, val[i] >> 3, channel);
      prevval[i] = val[i];
    }
  }
  // MIDI Controllers should discard incoming MIDI messages.
  while (usbMIDI.read()) {
  }
}
Since MIDI pot values are 7 bit, we're throwing away 3 bits of accuracy. Without the prevval check the device would spam MIDI commands as fast as it can, which is confusing for software.
The values read from the pots are also little bit noisy (probably due to noisy USB power from the PC), so sending a MIDI message only when the pot has changed enough to affect the pot value from MIDI's point of view makes sense.
I picked channel 5 randomly and set the pot values to 101-112, which is undefined by the MIDI spec, so it shouldn't collide with anything.
And here's Sassy listening to potbox.
(As always, comments are appreciated).