Sol's Graphics for Beginners
01 - Setting Up SDL with Visual Studio.NET 2003
(other platforms)
First, I created a new folder at the root of my 'D' drive called 'tutorial', and decompressed the SDL development package to it, like so:
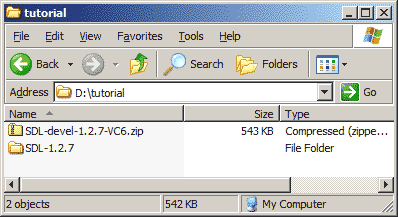

Note that the SDL zip contains the SDL-1.2.7 folder, so make sure you don't have any extra folders between 'tutorial' and the SDL directory. The directory structure should look like this:
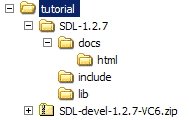

As you see, SDL comes with its own documentation, reading of which I do recommend. But you'll have time for that later. Next, fire up visual studio.
In visual studio, start a new project.
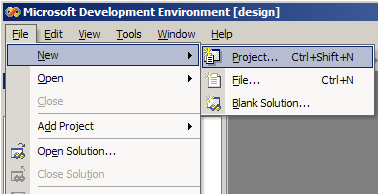

Under "Visual C++ Projects", select 'Win32 Project' under the 'Win32' folder. Set up the paths and project name as shown.
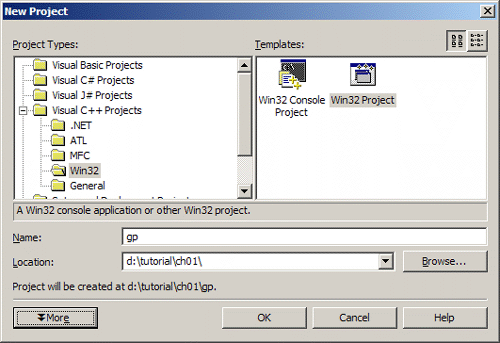

Next you'll be shown a friendly wizard. Click on the 'Application Settings' on the side bar, and make sure the 'Empty project' check box is ticked.
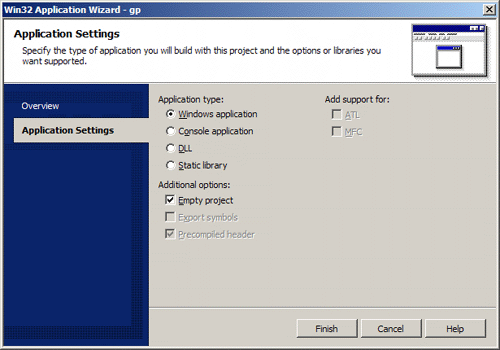

Click on 'Finish'.
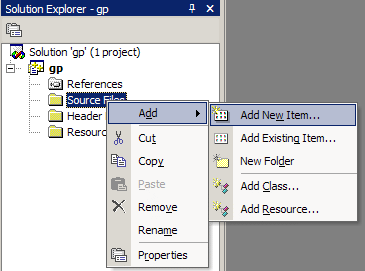
In order to use SDL, we need to set up some project settings. Because VS.NET2003 does not show all the options before we have a source file included in the project, we'll need to add that first. Right-click on the "Source Files" in the solution tree, and select 'Add New Item..'.

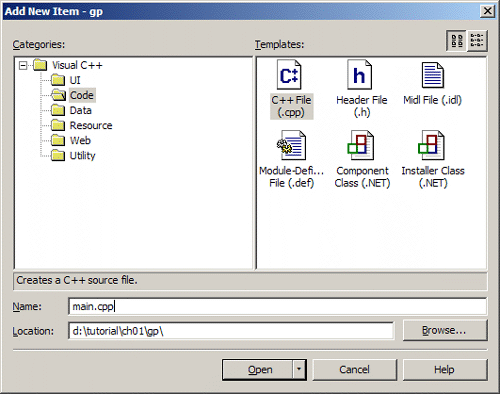
Make sure the 'cpp' file type is selected, name the file 'main.cpp', and click 'open'.

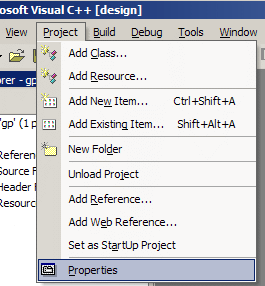
No need to add anything in the file yet; now we can access the options that we need to change. Go to 'Properties' in the 'project' menu.

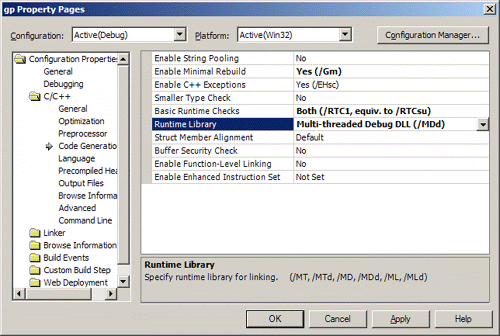
Select 'C/C++' folder, category Code Generation. Change the 'Run-time library' to 'Multi-threaded Debug DLL'.

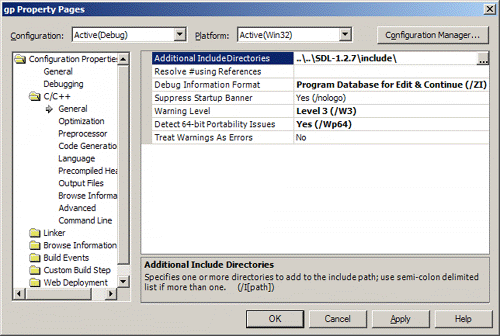
Next, select 'General' as category, still in the 'C/C++' folder, and add "....\SDL-1.2.7\include" (without quotes) in the 'Additional include directories' field.

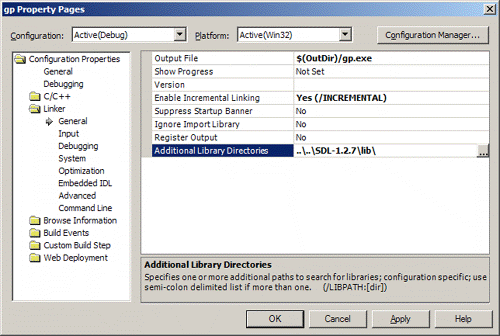
Then, under the "Linker" folder, in the 'General' category, add "....\SDL-1.2.7\lib" (yes, without quotes) to the 'Additional Library Directories' field.

After that, under the 'Input' category, add "SDLmain.lib sdl.lib" (again without quotes) in the "Additional Dependencies" field.
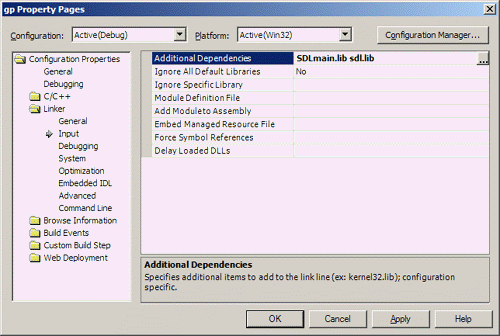

Click OK to accept the changes. Note that we've only changed the debug build settings, so, when you want to make a release build, you will have to do the same changes to the release build settings. (Except that you'll need Multithreaded DLL instead of Debug multithreaded DLL as the run time library).
Click on file->save all.
Next, copy SDL.dll from SDL-1.2.7\lib to the 'gp' directory under the 'ch01' directory.
After that, you are ready for 02 - SDL Skeleton and Putting Pixels..
Having problems? Try the forums!
Any comments etc. can be emailed to me.